-
Value - 9.8/10
9.8/10
-
Functionality - 9.4/10
9.4/10
-
Design - 9/10
9/10
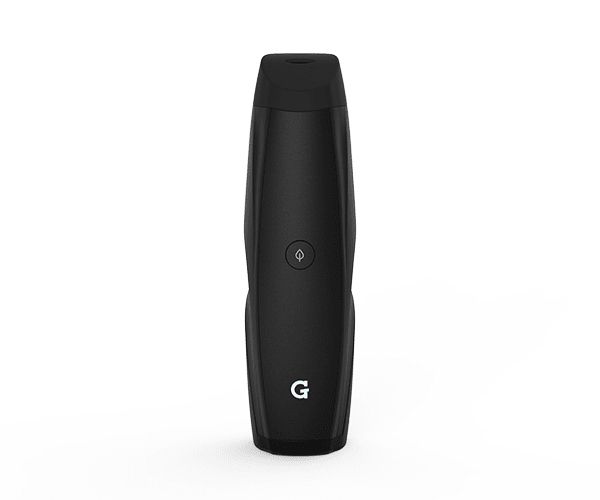
The G Pen Pro vaporizer is the original bestseller from Grenco Science. It’s a convection vaporizer for dry herbs that delivers excellent results.
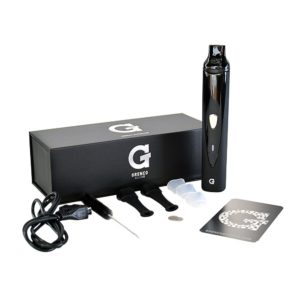
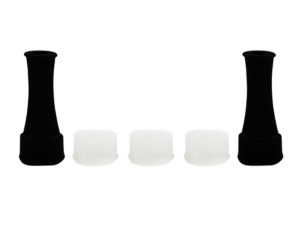
The G Pen Pro in a fairly large customized black box with the Grenco logo on it and a package that contains quite a few items. I felt as if I got a lot of things. The following items are included in the package: the vaporizer, the mouthpiece, one removable filter, five filter screens, a cleaning brush, two extended mouthpiece sleeves, three mouthpiece sleeves, the USB charging cable and the G Card for grinding.
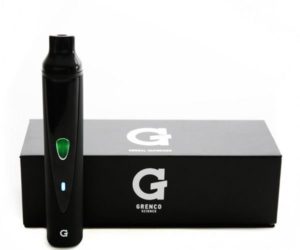
My first impression of this vaporizer was that it is not as small as I imagined. It is slim but it’s height is relatively large especially compared to their newer model the G Pen Elite. But as far as the actual design goes it’s very nice only maybe slightly outdated since it was first released back in 2014. It has the middles power button which is also used for indicating charging status and when it’s heating and good to go. Underneath the power button we have the temperature indicator light which as the name suggests is for indicating the temperature level. So that is pretty much it. The mouthpiece is the only removable exterior part, so it’s a very simple vaporizer to work with.
As with other similar products before going into the actual test the first thing is to fully charge it. You do this via the included USB cable and a full charge takes around 3 hours. Connect the USB cable to the base of the vaporizer and the central power button will turn red. Once the charging is finished it will turn green.
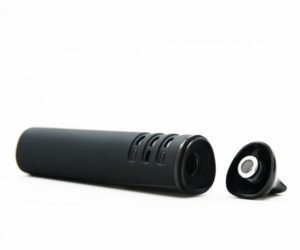
Then you can remove the G Pro mouthpiece by applying pressure upward to either side and it will come of. You will notice the detachable screen at the bottom of the mouthpiece which you detach by unscrewing the metal part and pushing it out and placing a new one. You get 5 replaceable screens in the package which will last you quite a long time as the you hardly ever need to replace it. Then you will also notice the heating chamber which is fairly large and you can pack about 0.5g of material there. My only recommendation is that you finely grind the material and don’t overpack the chamber in order to get the best results.
Once you have the heating chamber packed it’s time to put the mouthpiece back on and hit the power button 5 times in order to power up the vaporizer. After you’ve done this you will see the power button turn red while the temperature indicator will also power up. The G Pen Pro Vaporizer has three built-in temperature setting. Depending on the color of this indicator you will know at which temperature the vaporizer is at. There is the red color for the lowest setting of 320 F (120 C), the green color for 380 F (193 C) and blue for the highest temperature setting at 420 F (215 C). In order to toggle between the different setting all you need to do in press and hold the power button. Grenco recommends you start out with the lowest setting and work your way up until the find which setting is best for you.
After about 60 to 90 second after you have powered up the vaporizer the power button will turn from red to green which means it’s good to go and you can start taking hits. One thing to mention is that before taking the hits you can opt to put on of the mouthpiece sleeves on. You have the option of the long extended mouthpieces or the shorter ones. Both options are nice to the feel and I recommend you use them as the mouthpiece alone can get pretty hot.
Since this is convection vaporizer the quality of the smoke is excellent. I did have to wait some time for ti to heat up but it was worth it. I have to emphasize that you can really feel the taste of your herb and depending on the quality of your herb I also suggest you try the different temperature setting. So as far as the quality of smoke goes this is a very good vaporizer.
Then after usage it’s time to clean it. Cleaning your vaporizer should never be an over-looked task. It’s important to keep it your vaporizer clean in order to increase it’s lifespan. Thankfully this is not a painful process here. First you need to wait for the heating chamber to cool down then remove the mouthpiece and use the included cleaning brush to sweep out any remaining material from the heating chamber. Then clean the mouthpiece with rubbing alcohol and unscrew the filter from mouthpiece and clean (or replace) if needed and you’re done. It’s that simple.
Overall this is a vaporizer that will deliver excellent vapor quality. You have to compromise however on a slightly outdated design and the use of mouthpiece sleeves which takes away from it’s discreetness even more. However the price is fantastic and represents a value purchase.
